WinZip
Get Winzip
|
|
Software AG is providing this link to you only as a convenience, and the inclusion of any link does not imply endorsement by Software AG of the site. The linked site is not under the control of Software AG and Software AG is not responsible for the contents of any linked site or any link contained in a linked site. The company which the link refers to is a separate legal entity. Therefore, Software AG is not liable and does not make any warranties of any kind regarding the products of this company. You may need to enter into separate licence agreement with this company. |
Using WinZip
Below you will find an overview on how to use WinZip.
Step 1: When starting WinZip the following window will appear:
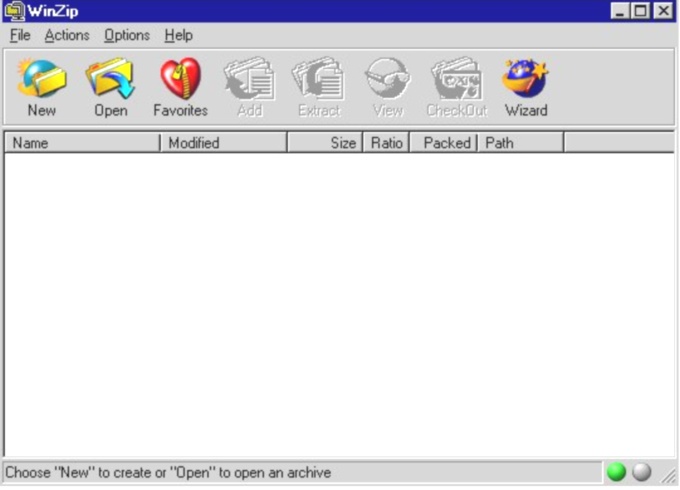
Step 2: To compress a file click on NEW. Now you get this window:
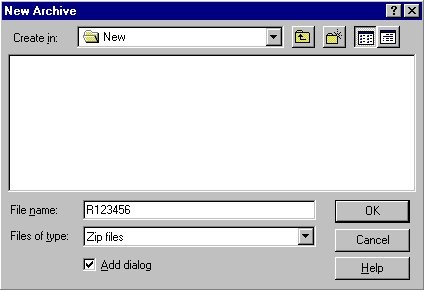
Choose your destination directory and type in the name of the compressed file in the File name field. Name this file R followed by your request number, then click OK.
Step 3: Now the following window will open
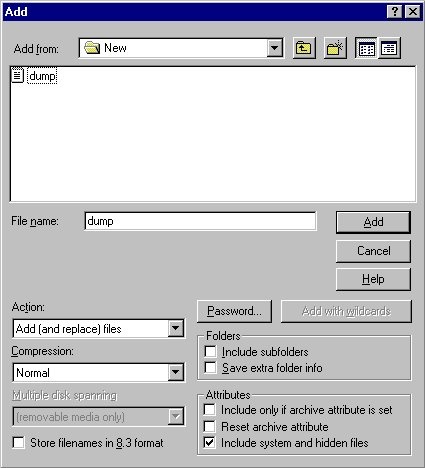
Add the needed file(s) to your ZIP-Archive by choosing it from the source-directory.
Step 4: Select the file you want added to the ZIP-Archive and click on ADD. The file will be compressed and added to your archive.
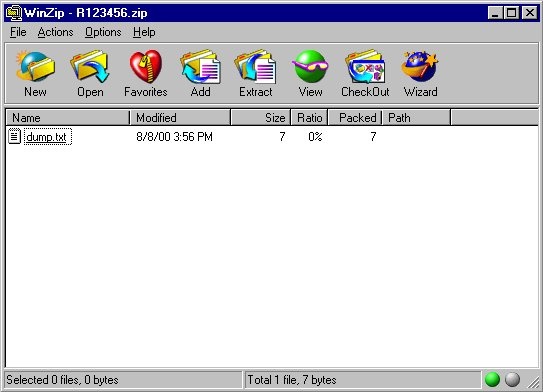
Step 5: This screen will be displayed:

Here you see which files are momentary contained in the archive. If you want to add more files to the archive you have to click on add and repeat step 3 and 4.
Step 6: When you have finished, close WinZip. You find the archive named R******.zip in the destination directory:
PKZip
Using PKZip
Get PKZip
|
|
Software AG is providing this link to you only as a convenience, and the inclusion of any link does not imply endorsement by Software AG of the site. The linked site is not under the control of Software AG and Software AG is not responsible for the contents of any linked site or any link contained in a linked site. The company which the link refers to is a separate legal entity. Therefore, Software AG is not liable and does not make any warranties of any kind regarding the products of this company. You may need to enter into separate licence agreement with this company. |
Using PKZip
After starting PKZip for Windows the following window will appear:
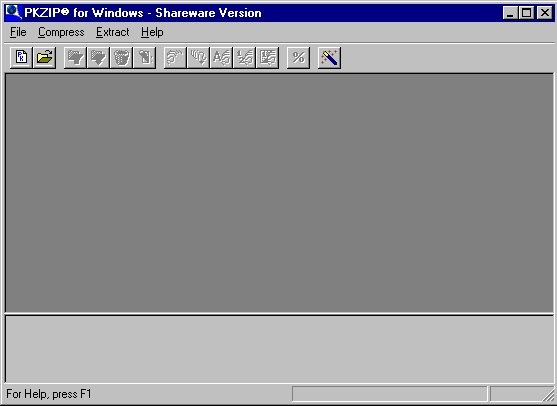
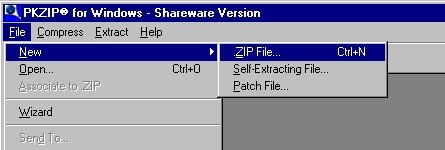
To create a new Zip-archive choose the option .Zip-File... as shown in the image below:
Now type in the name of your Zip-archive in the file name field. Please name the Zip file R followed by your request number:
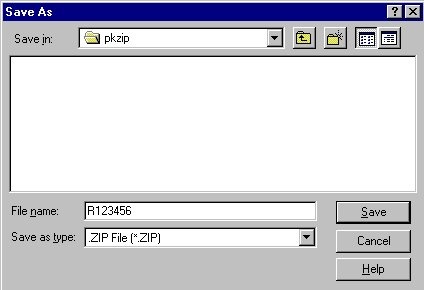
You will get the following window:
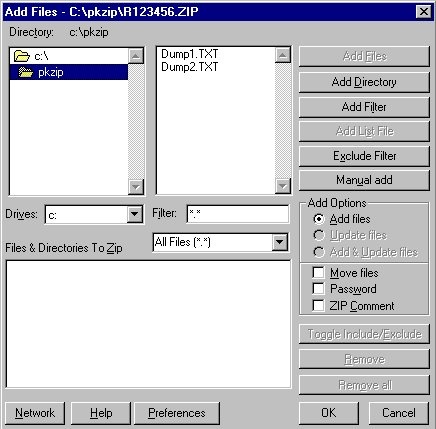
Now select the source directory and the files which should be added to the R123456.zip archive. Then click on Add Files. You will get this window:
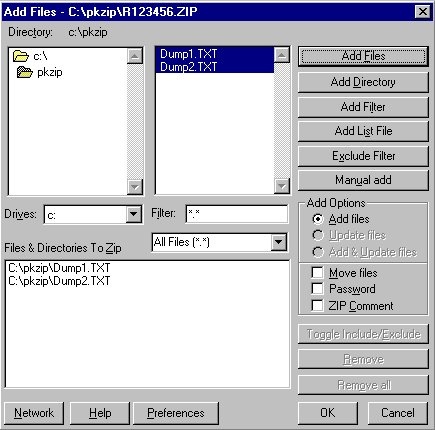
 Confirm by clicking on the OK button. You get a window similar to the one below:
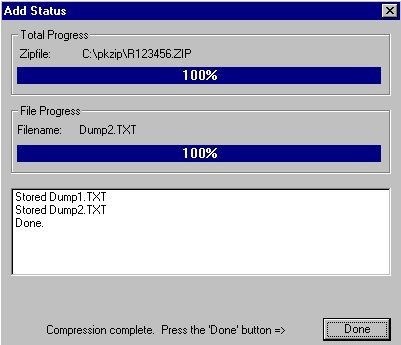
Click on Done and you will see the main program window again. You have now another window which gives information on your new Zip-archive:
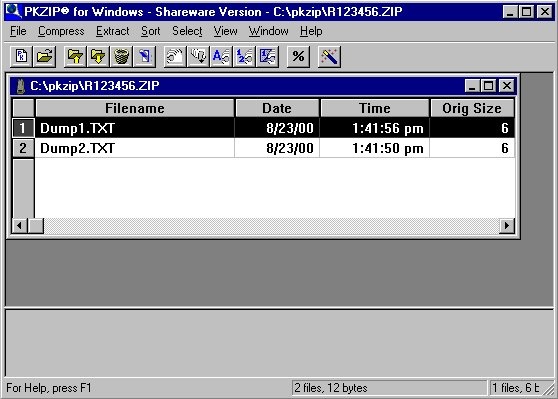
Now you can exit PKZip. You find the Zip-archive in your destination directory as shown in the title bar above.

